Learning how to get rid of flute tarnish is more important than you might think.
It’s like buying a new car; only to find that the interior is stained, and the trunk is full of garbage.
Recently, I took a walkabout Europe where I had the pleasure of meeting and staying with a nice family in Holland. They were big music enthusiasts, and had instruments of all types in their home.
I noticed they had a flute sitting on their piano, and I was drawn to it like a magnet. As I reached out to pick it up, my heart sank at the site. It was as brown as a tree trunk, instead of silver and shiny as it had originally been at the time of manufacturing.
The family encouraged me to play it for them, and I had my doubts that it would work enough to play even one note. How could I tell? That much flute tarnish also indicates that the mechanism would be gummed up and non-functional. I was right. I did however try and try for a few minutes, because they had wide eyes and excitement on their faces at the prospect of a professional in their home.
I explained to them that perhaps the instrument could go visit a technician someday to regain its function, but I made it through part of the Carnival of Venice anyway. They admitted it had been sitting out on top of the piano for about three years.
Exposure to light and air cause flute tarnish
Depending on where you live and how often your flute sits outside of its case, it may start to turn brown sooner rather than later.
Here are three tips you can use to combat flute tarnish like a pro:
1. First, keep your flute inside its protective case every day and night (when you’re not playing it, of course). Flutes will begin to tarnish within just a few hours. Try not to press your luck. The tarnish will eventually ‘rust’ the mechanism and it will literally freeze up. The pads will also dry completely up with prolonged exposure to air and light.
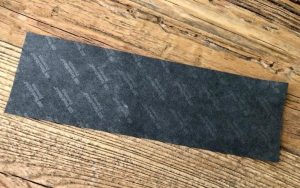
2. Care for your flute as if it were part of a fine china and silverware set. My grandmother had a case of real silver placesettings. My mom used to take it out every few months and let me help her polish the spoons, knives, and forks. They were so beautiful when we finished. It always made a big difference to add an anti-tarnish strip to the case before we closed the lid of the silverware. This is the same idea we can take to our flute care. Adding a Silver-Saver type paper inside the case does wonders to combat flute tarnish. I suggest you change them every 6 months or so. Your flute will thank you!
The Anti-tarnish strips can look something like the image on this page. Sometimes it’s a long white paper. Some people think it’s part of the packaging and should be thrown away, but this is not the case. Write the current date on each strip and keep it in there so you can replace as needed.

3. Cleaning your instrument thoroughly after playing is probably the number one way to keep its appearance shiny and new. The oils on our fingers and the sugars in our breath can speed up the process of flute tarnish. Swab out the inside and then wipe off the body and keys with a nice, soft (non-fibrous), cloth after every practice session.
In the video you’ll notice that I instruct you to always spray the denatured alcohol on your cloth first. Never just spray the flute- you may accidentally get it on the pads, which will dry them. Dry pads cause small leaks, which hinder the ability to get a nice clear tone.
Warning: take extreme care not to damage the mechanism of the flute while you are wiping it off. Rubbing too hard can cause bent rods or moved pads. Read: flute won’t work anymore.
In extreme cases such as the flute I encountered on my trip through Holland, the flute will need to see a technician who can take it apart and polish it up properly. This is actually a high priced service, so ask for a quote before leaving it to be done. Low quality flutes may not be worth the price. Sad but true.
Have you had any troubles keeping your flute shiny?
Some people wonder about using silver polishing producst. It’s true that they can do the job for the head joint or the barrel, but it is not recommended because it usually gets stuck up in the mechanism. This causes a technical nightmare for the functionality of the flute.
The tips you’ve found on this page will take care of the flute tarnish we all dread.
It’s a really exciting day when your flute looks and sounds fabulous. Keep your flute shiny, and enjoy your flute success this week!


Thanks, Rebecca. I just bought a package of the silver saver strips and it does not tell how long they should be used before changing them.
Butch
Hi Butch, I change them about every 4 months. 3 times a year seems to be good – put it on your calendar so you remember. Good job, your flute will thank you for this! 🙂 Rebecca
Thanks a bunch, this is really helpful.
You’re welcome! I’m glad you’re here taking care of your flute, I wish you the best of luck. Happy fluting! – Rebecca