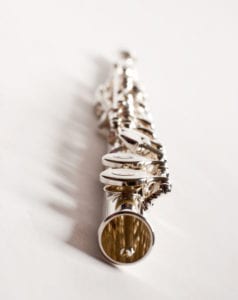
Learning how to align your flute is very important when going to play. It has an effect on your sound, position, tone, fingering, and so much more. In this Learn Flute Online article, we’ll explore how best to line up your flute. This will be one of the first things, and one of the very best things you can learn when getting started on the flute.
Lining up the head joint is more important than you may think. Trying to sound good and play your flute in tune is tricky!
I have a few tips and tricks for you to be able to get that perfect set up, every time.
Aligning the center of the mouth hole with the center of the rest of the keys works best.
In my experience, the best way to put together your flute is by aligning the middle of the hole for your mouth with the middle of the rest of the keys. I have found this most productive because although mouth embouchure, arm and hand size, and facial size differ, this is a good starting point to get the flute in tune, and keep us from creating a fuzzy sound.
It is common for some students to tip the head joint back towards their face- thinking it helps them get a better tone. This just ends up causing other issues. Keep in mind that a nice level headjoint is always the end goal.
Now assemble your flute using these tips.
There are a few tips and tricks that allow you to assemble your flute as easily as possible.
First, keep your flute pieces in the case and take them out one at a time instead of taking all three pieces out and trying to juggle them in your lap for assembly. This can be dangerous, as you can accidentally drop one or multiple parts of the flute.
Personally, I like to twist the body and the head together first. Once these two pieces are together, I align them with one another. This alignment is important, as it can affect the way you hold your flute, as well as your tone.
Once I have the body and the head put together, I carefully put the foot and the body together as well. Be mindful as you do this- you don’t want to squish the keys.
After twisting the pieces together, what’s next?
After you twist the pieces of the flute together, you can hold the flute horizontally, looking down like the barrel of a gun. While doing this, you can check to see where the tone hole of the mouth piece lines up. Because the flute is already assembled, it will be easy to twist and adjust so that the keys line up with the hole on the top of the body of the flute.

The foot joint is a different story. Check your right hand. Is your pinky shorter than the rest of your fingers? Yup. It is.
Place your right hand top fingers on the keys and then with nice ‘relaxed’ hand position notice where your pinky naturally reaches to. You’ll want to twist the foot joint into place exactly where your pinky sits. This will NOT be nice and straight with the body keys. *This is why the foot joint is made separately. It help you have a custom made flute every day!
How to assemble the same way each time?
Now, is it possible to assemble the flute the same every time? With some practice, you’ll get really good at it.
I use a couple of little dots of fingernail polish to help my rookies get the same alignment every time. By placing one dot on the head piece and another on the top “brink” of the body is a great way to notice the same spot every time.
Although it seems simple, it is so important to understand how to assemble your flute. Now that your flute is put together, you can be well on your way to making amazing music! Glad you stopped by today!
For those of you who are visual learners, here is a YouTube video on how to properly align your flute: https://youtu.be/KJpU_rv-Xwg Enjoy!


Hola Rebecca……………thank you so much for the information and tips, I will use them!!!
Paty
You’re welcome! Glad you’re here learning. ~Rebecca
Thanks! I definitely improved since listening to the first five modules, and reading this article.
Nedra
Great. There’s new content coming out every week. Watch your inbox too. 🙂 Rebecca